
Connect your Meeting Room Schedule door display to Microsoft 365 rooms using Microsoft Graph API (Enterprise app registration – Client secret)
With the recent update to our platform, Meeting Room Schedule now fully supports Microsoft Graph API connections for a smoother, more secure, and modern integration with Microsoft 365 calendars. This guide walks you through setting up your calendar type, choosing Microsoft Enterprise app registration – Client secret method, filtering resources, and pushing the calendar to your display device. This method uses an application registered in Microsoft Entra ID to authenticate with Microsoft Graph using a Client Secret. This option is suitable for companies with an internal IT team, Microsoft 365 administrator, or managed service provider who wants to control application access centrally. It can be a good fit for organizations managing multiple meeting room displays and preferring application-based authentication over individual account sign-ins. The Microsoft 365 administrator must provide the Application (Client) ID, Tenant ID and Client secret.
For other enterprise authorization scenario such as authentication with Microsoft Graph using a certificate, read here, or authentication with Microsoft account sign in, read here.
Connect the resource calendar to Meeting Room Schedule through admin website
- Sign in to the Meeting Room Schedule Admin website using the login credentials sent to your email address during the Meeting Room Schedule app registration process.
- Click Show More to view the advanced device settings.
- Select Calendar Type under Calendar Connection header, select Microsoft 365. The corresponding configuration fields will appear below.


This method uses an application registered in Microsoft Entra ID. For detailed instructions on app registration in Microsoft Azure, see here.
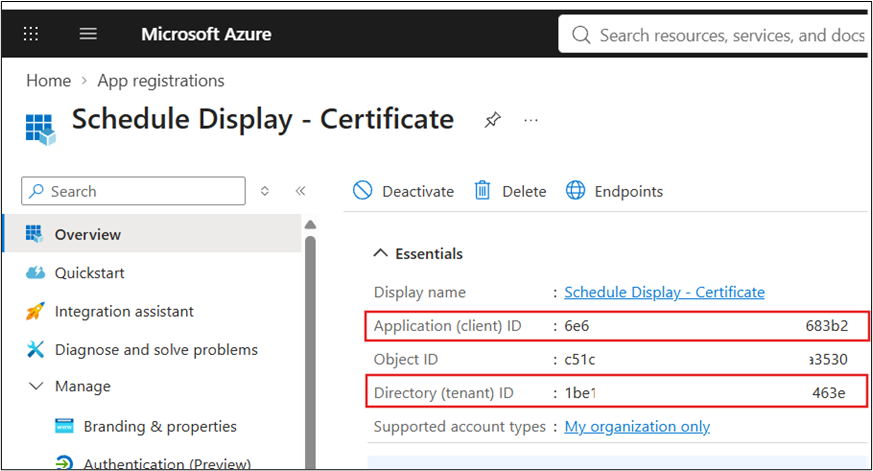
- Copy the following information from your Microsoft Entra ID application registration
-
- Application (Client) ID: Find this under Microsoft Entra ID > App registrations > Your Registered App > Overview.
- Tenant ID: Find this under Microsoft Entra ID > App registrations > Your Registered App > Overview.
- Client secret: Find this under Microsoft Entra ID > App registrations > Your Registered App > Manage > Certificates & secrets > Client secrets. Copy the secret Value when creating it, as it cannot be retrieved later.
-

- Enter the information in the corresponding fields and click Authenticate.


- Check the authentication status. The status should now show that the authentication was successful and the step is marked as complete.

-
-
- If changes are required, the authenticated Microsoft app must be removed first.
- Click Remove to remove all stored Microsoft 365 account and calendar details. All the displays will also be disconnected.
-
- Select Resource Calendar
- Select the desired resource calendar from the displayed list.
- For faster searching, you can enter 2–3 characters in the “Filter search results” field.
- After selection of the resource calendar, this step will automatically be marked as complete.


- Push calendar to the device
- Click “Push to Device” to transfer the updated settings to the selected display.
- After successful transfer, this step will also be automatically marked as complete.


- The Meeting Room Schedule app will automatically restart and then display the room calendar events.
Unlink or Change the Connected Resource Calendar
- Once a resource calendar has been successfully linked to a display, an Unlink button will appear.
- Click Unlink to disconnect the currently linked resource calendar from the display.
- Select the desired resource calendar from the Select calendar from the resource list dropdown.
- Click Push to the device to link the selected resource calendar to the display.

- To switch directly to another resource calendar, simply select the desired resource calendar from the Select calendar from the resource list dropdown and click Push to the device. The display will then be linked to the newly selected resource calendar.
Leave a Comment