Connect Meeting Room Schedule with Microsoft MFA enabled meeting room
How to Connect a Meeting Room with MFA Enabled to Meeting Room Schedule
Managing room calendars securely is a top priority for modern organizations. Enforcing Multi-Factor Authentication (MFA) on your Microsoft 365 resource accounts prevents unauthorized access and secures your corporate data.
However, standard password authentication often fails on wall-mounted tablets and display apps when MFA is turned on. Fortunately, Meeting Room Schedule natively supports Microsoft’s modern authentication.
In this guide, we will walk you through how to enable MFA for your room accounts via Microsoft 365 and how to seamlessly link them to the Meeting Room Schedule app.
Step 1: Enable MFA on the Microsoft 365 Resource Account
Before configuring the tablet app, you must ensure that your meeting room account has Multi-Factor Authentication active. Microsoft provides multiple ways to set this up depending on your tenant settings (Security Defaults, Conditional Access policies, or Per-user MFA settings).
To configure this globally for your users and resource emails, follow the official instructions provided by Microsoft:
Microsoft Official Guide: Set up multi-factor authentication for users
Step 2: Connect the MFA-Enabled Account to Meeting Room Schedule
Once your room account is secured with MFA, follow these visual steps on your display device to establish a secure connection using modern authentication.
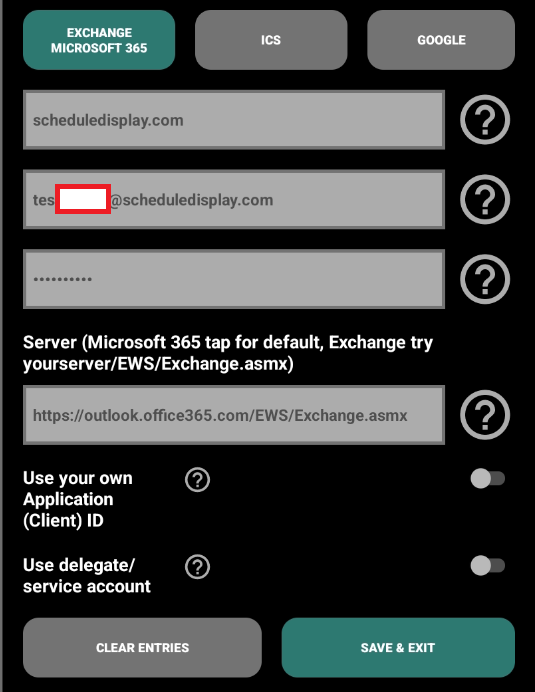
- Open the Meeting Room Schedule app settings on your device and select Connection Settings / Exchange Microsoft 365. Enter the required details, keep the default Microsoft 365 EWS server URL and press Save & Exit.
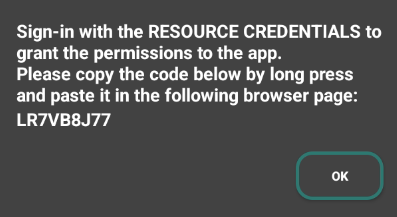
- A pop-up dialog will appear displaying a unique security code. Long-press to copy this code or write it down and press OK.
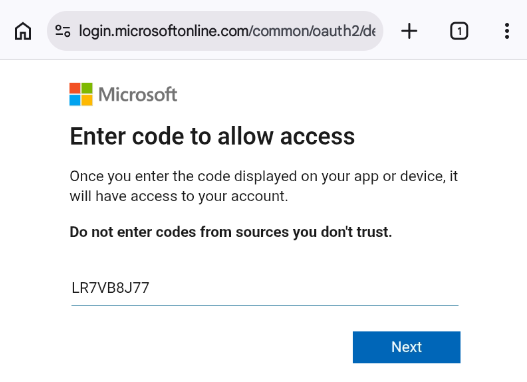
- The browser will open automatically on the display device, showing the popup from Microsoft to enter the code. Paste or type the code provided by the app into the field and click Next.
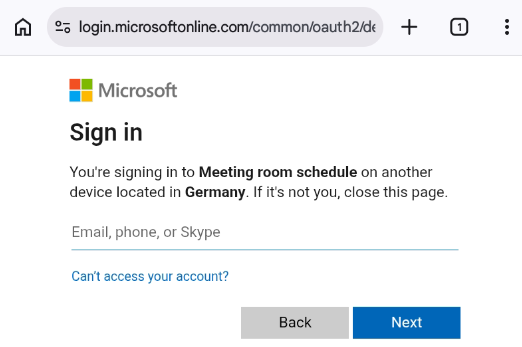
- Microsoft will ask you to identify the account trying to connect. Enter the email address of your meeting room resource mailbox and click Next.
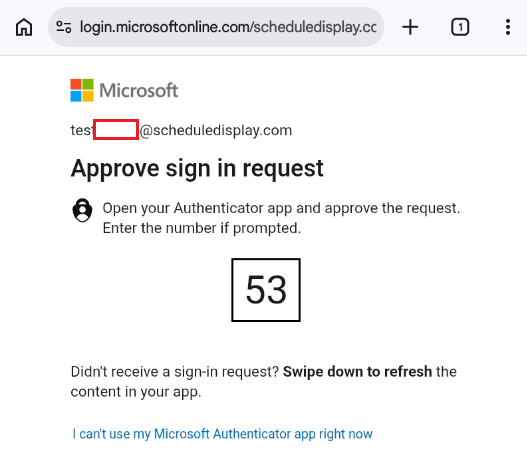
- Because MFA is enabled, Microsoft will trigger a security prompt. If you are using Microsoft Authenticator app-based MFA, a number challenge will appear on your browser screen. Open your authentication app on your phone/admin device and match the number to approve the sign-in request.
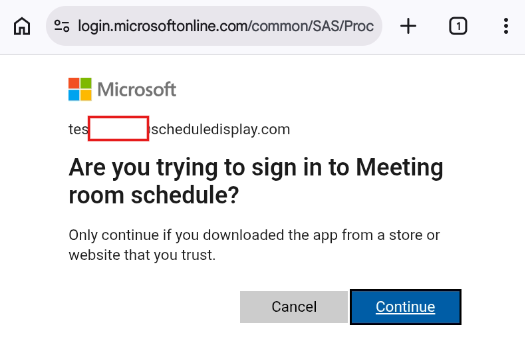
- After completing the MFA challenge, Microsoft will verify if you want to sign into the Meeting Room Schedule app. Click Continue to trust the application and grant it permission to read/write the room’s calendar events.
- Once approved, the browser will display a success message. You can now safely close the browser window.

- Return to your Meeting Room Schedule app on the tablet. The app will check the permissions and automatically go to the main display screen.
Leave a Comment